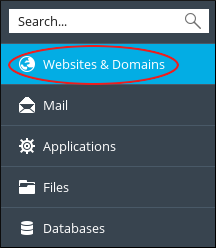
To manage the DNS zone for a domain, follow these steps:
- Log in to Plesk.
- In the left sidebar, click Websites & Domains:

- Click DNS Settings:

-
On the DNS tab several settings are available:
- To turn off DNS entirely, click .
- To switch between using the Plesk DNS server as a master or slave, click .
If you want to use an external DNS zone for the domain, make sure you set the Plesk DNS server to act as a slave.
- To restore the default DNS settings, click .
Adding DNS records
You can add many different types of records to the DNS zone for a domain (for example, CNAME, MX, PTR, and more). The following procedure demonstrates how to add an A record to the DNS zone. An A record enables you to point a subdomain to an IP address:
- Log in to Plesk.
- In the left sidebar, click Websites & Domains:

- Click DNS Settings:

- Click .
- In the Record type list box, select the type of record you want to create. In this example, select A.
- In the Domain name text box, type the name of the subdomain.
- In the IP address text box, type the IP address of the server.
- Click . Plesk creates the DNS record, but does not activate it.
-
Click . Plesk activates the new record.
If you change your mind and decide that you do not want to enable the new record, click .
Deleting DNS records
To delete a DNS record for a domain, follow these steps:
- Log in to Plesk.
- In the left sidebar, click Websites & Domains:

- Click DNS Settings:

- In the list of records, select the check box next to the record that you want to delete.
- Click .
- To confirm the record deletion, click . Plesk deletes the DNS record.
More Information
For more information about Plesk, please visit https://www.plesk.com.


