
The deliverability settings in PLESK include:
- DomainKeys Identified Mail (DKIM).
- Sender Policy Framework (SPF).
- Domain-based Message Authentication, Reporting and Conformance (DMARC).
DomainKeys Identified Mail (DKIM)
DKIM verifies that an incoming e-mail message is actually from the stated sender, and that the message has not been altered during transit. When DKIM is enabled, the sender digitally signs a message using a private key. The recipient uses DNS to retrieve the sender's public key and verify the message's signature. If the signature is invalid, then the message is assumed to be forged and therefore spam.
Sender Policy Framework (SPF)
SPF helps prevent spammers from forging messages that implicate your domain as the sender. As a result, SPF can also reduce the amount of bounce messages that you receive (also known as backscatter spam). SPF uses DNS records that specify the mail servers and IP addresses that are authorized to send e-mail messages from a domain.
To enable SPF for your domain, follow these steps:
- Log in to Plesk.
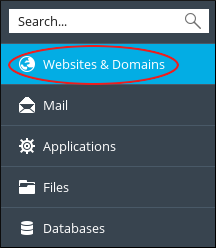
- In the left sidebar, click Websites & Domains:
- Locate your domain, and then click DNS Settings:

- Click . The Add a Resource Record to the Zone page appears.
- In the Record type list box, select TXT.
- Leave the Domain name text box blank.
-
In the TXT record text box, type the following value:
v=spf1 +a +mx +include:spf.a2hosting.com ~all -
Click . SPF is now enabled for your account.
Allow 24 to 48 hours for the DNS changes to take full effect.
DMARC
DMARC (Domain-based Message Authentication, Reporting and Conformance) is an e-mail authentication method designed to help reduce e-mail abuse, such as spam. It builds upon the SPF (Sender Policy Framework) and DKIM (DomainKeys Identified Mail) authentication methods to provide e-mail senders and recipients a more reliable way to exchange messages.
To enable DMARC for your domain, follow these steps:
- Log in to Plesk.
- In the left sidebar, click Websites & Domains:
- Locate your domain, and then click DNS Settings:
- Click . The Add a Resource Record to the Zone page appears.
- In the Record type list box, select TXT.
-
In the Domain name text box, type the following value:
_dmarc -
In the TXT record text box, type the DMARC configuration line.
DMARC is not yet a fully standardized protocol. As a result, different providers handle DMARC policies in different ways. You may have to experiment with various DMARC configurations to find the one that works best for your domain. Here are some example DMARC configurations:
- Enable DMARC “monitor mode”. With this configuration enabled, the specified e-mail address (in the mailto setting) receives daily reports from providers regarding how many messages were received, and whether or not they passed policy checks:
v=DMARC1;p=none;rua=mailto:[email protected] -
Instruct the recipient to quarantine all messages (100%) that do not pass policy checks:
v=DMARC1;p=quarantine;pct=100; -
Instruct the recipient to reject half of all messages (50%) that do not pass policy checks. The remainder should be quarantined:
v=DMARC1;p=reject;pct=50;
- Enable DMARC “monitor mode”. With this configuration enabled, the specified e-mail address (in the mailto setting) receives daily reports from providers regarding how many messages were received, and whether or not they passed policy checks:
-
Click . DMARC is now enabled for your account.
Allow 24 to 48 hours for the DNS changes to take full effect.
More Information
- For more information about DKIM, please visit http://www.dkim.org.
- For more information about SPF, please visit https://en.wikipedia.org/wiki/Sender_Policy_Framework.
- For more information about DMARC, please visit http://dmarc.org.
- For more information about Plesk, please visit https://www.plesk.com.

