
About Let's Encrypt
Let’s Encrypt is a free, automated, and open certificate authority (CA) from the Internet Security Research Group (ISRG). It enables anyone to install a free, trusted SSL certificate on their website and benefit from the enhanced security an encrypted connection provides. Unlike a self-signed SSL certificate, which is also free and secure but not verified, a Let’s Encrypt certificate is recognized as fully verified, and displays the padlock icon in the address bar of modern web browsers.
Plesk provides a plugin that enables you to manage Let’s Encrypt SSL certificates.
- The domain name for which you want to install a Let’s Encrypt SSL certificate must resolve in a web browser (even if the site has no content). You cannot obtain a Let’s Encrypt certificate for a domain name that does not pass validation.
Installing a Let’s Encrypt SSL certificate on your domain
To install a Let’s Encrypt SSL certificate on your domain, follow these steps:
- Log in to Plesk.
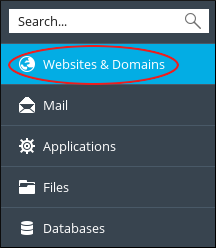
- In the left sidebar, click Websites & Domains:
- Click the Let’s Encrypt icon:

The Let's Encrypt SSL Certificate page appears:
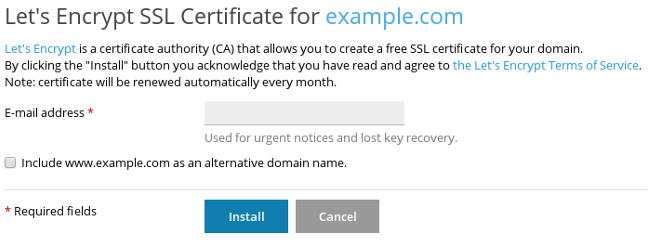
- In the E-mail address text box, type a valid e-mail address.
-
Select the Include www.example.com as an alternative domain name check box if you want the SSL certificate to protect your domain with and without the www prefix.
If you do not select the check box, the certificate is only valid for example.com. If you select the check box, the certificate will be valid for example.com and www.example.com. -
Click . When installation is complete, you receive a Let's Encrypt SSL certificate was successfully installed on example.com message.
If installation fails, make sure that the domain name is valid. Check also that the domain:
- Is spelled correctly.
- Is registered and active.
- Resolves in a web browser.
If you have just created or added a domain to the server, also make sure that you have added the appropriate DNS records (at a minimum, an A record pointing to the server IP address), and allowed sufficient time for the DNS changes to propagate.
- In the left sidebar, click Websites & Domains:
- Click .
- Under Security, confirm the SSL support check box is selected, and the Let’s Encrypt SSL certificate is selected in the Certificate list box.
Renewing a Let’s Encrypt SSL certificate for your domain
Plesk automatically renews Let's Encrypt certificates, with no action necessary on your part.
By default, Let’s Encrypt SSL certificates are valid for 90 days. However, Plesk automatically renews certificates once a month, as recommended by the Let’s Encrypt developers. The shorter renewal period helps ensure your site's security, and is completely transparent to you and your site’s visitors. Additionally, if a renewal attempt fails for any reason, you have sufficient time to troubleshoot the problem before the certificate expires.
If you need to renew a certificate manually for some reason, follow these steps:
- Log in to Plesk.
- In the left sidebar, click Websites & Domains:
- Click the Let’s Encrypt icon:
- Click .
More Information
For more information about Plesk, please visit https://www.plesk.com.

